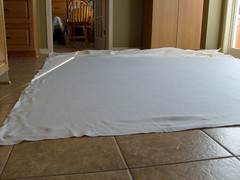
Tape backing fabric, right side down, to a flat, hard surface with masking tape. Tape it tightly so the fabric is completely flat, with no ripples.

Lay the batting over top of the backing. I used a thin cotton batting, somewhat larger then the finished quilt size. Starting at the center, smooth the batting onto the backing with a flat palm, massaging out any ripples and folds to the outside.
Center the top over the backing and batting. Once again, starting in the center, smooth the fabric out.
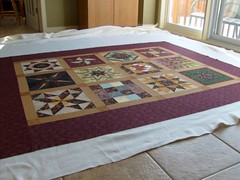
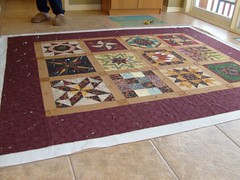
Using curved quilter's pins, begin pinning the quilt through all three layers. Start in the center and working out, saving the border for the last, and smooth as you go. There should be pins at least every three inches.

I was taught to rip the whole thing off the floor after pinning to check that the backing hasn't un-smoothed itself during the pinning process. I've never had a problem with this so I skip this step. With a self-healing mat, an Olfa rotary cutter and a quilting ruler, trim off excess batting and backing.
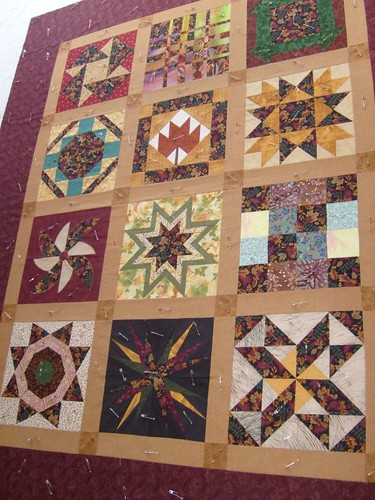
The quilt is now in the sewing room. It's not a masterpiece quilt or anything, so quilting treatment will be light... I'm stitching in the ditch on the sashing and posts, and highlighting one feature within each block with quilting. I'll do some free-motion play for the border.
3 comments:
Oh my god...that looks so beautiful and girl you can probably fly a rocket to the moon in your spare time, eh?
I want to come and stay at your house just so that I can sleep under one of those beautiful quilts.
You must have such a sense of accomplishment. You do beautiful work! I see kitty was helping :)
Post a Comment